An overdue catch up… with SAUSAGE ROLLS.

I am going to desperately try to commit a little more to this page. As I have previously mentioned, I am far better at using my instagram, but for the last year I have been frantically working ridiculously hard to pass my PGCE (and I did!). It really didn’t leave me with a lot of time to post on here, or on my instagram. BUT, I am really going to try this time.

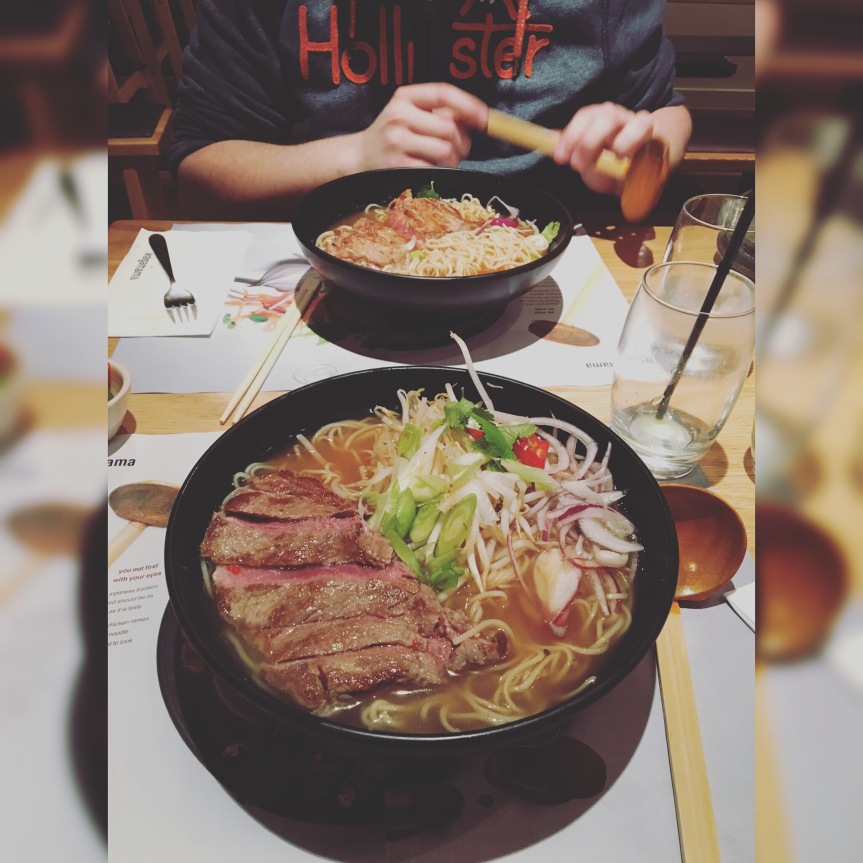
I love cooking. I love everything about it – not just eating the final product. 

And I miss this blog. I miss it. So I am coming back, and we will see how long it lasts.

The truth is, in the last few years I have become very independent when it comes to cooking. I don’t often follow recipes anymore. I throw together what I fancy and something new is born. BUT, as useful as that is for me, its really not that useful for those of you who message me and ask for the recipe. Truth is, I have no idea what the recipe is.

Alas, I’ll give this one a go.

Now this is a favourite of mine. FOR THOSE OF YOU WHO LOVE A SAUSAGE ROLL then you need to listen up. 

IMG_0514

These babies are good – they are great. I saw the idea on an episode of “Eat Well for Less” and I never looked back.

First thing is first, get yourself to Marks and Spencers because they do the best skinny sausages I have ever had. (Added a link for you – because I’m good to you). These are GREAT and they have never not been on the 2 for £5 offer. If you fancy popping to Sainburys, they stock heck super lean sausages which are great too – I just prefer the juicier M&S ones. ** GIVE IT A GO WITH CHICKEN SAUSAGES TOO – THEY ARE STILL GREAT! **

However, if you really aren’t the bothered about the fat content of your sausages then just go ahead with your favourite bangers – BUT THE BETTER THE QUALITY, THE BETTER THE SAUSAGE ROLLS. Please get some bangers with a good amount of pork percentage. (Equally, if you are a veggie or vegan then given these a go! I made these at christmas with some chestnut and cranberry soy-sages from a great little vegan shop in Norwich called Tofurei – give them a visit if you are ever around because I just eat their soy-sage rolls because they’re great).

Enough with the chit-chat, right? You want the sausage rolls.

Screen Shot 2018-08-04 at 21.44.32

Ingredients

  • 50g/1¾oz butter or vegetable oil
  • 6 pork sausages (or whatever else you fancy!)
  • 6 large sheets filo pastry, room temperature (ideally remove from the fridge 20 minutes before needed)
  • salt and pepper
  • OPTIONAL (but a must-have if you are me) – caramelised onion chutney. (Here’s a little idea that I like to use – whack in whatever you want! I’ve tried chilli jam, mustard, pesto when using chicken sausages.. whatever you fancy!)

Method

  1. Preheat the oven to 210C/190C Fan/Gas 7 and line a baking tray with greaseproof paper.

  2. Melt the butter in a small saucepan over a low heat and season with salt and pepper. If using oil, just season the oil in a bowl with a pastry brush to hand. Meanwhile, make a slit along the side of the sausages, peel the skin off and discard.

  3. Lay a sheet of filo pastry on a clean work surface and brush with the melted butter/oil. Layer another sheet on top and brush with more butter. Lay two sausages along the shortest edge of the filo, then roll it up to form a long sausage. If you are using the caramelised onion chutney they layer a thin line on top of the sausage meat and roll with the sausages. Cut into four pieces and place onto the baking tray. Repeat this step another two times.

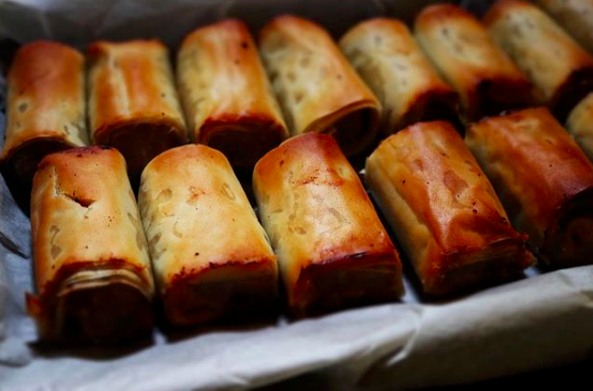
  4. Brush the tops of the rolls with any remaining butter/oil and bake in the oven for 25 minutes until cooked through and golden-brown.

Screen Shot 2018-08-04 at 21.43.59.png

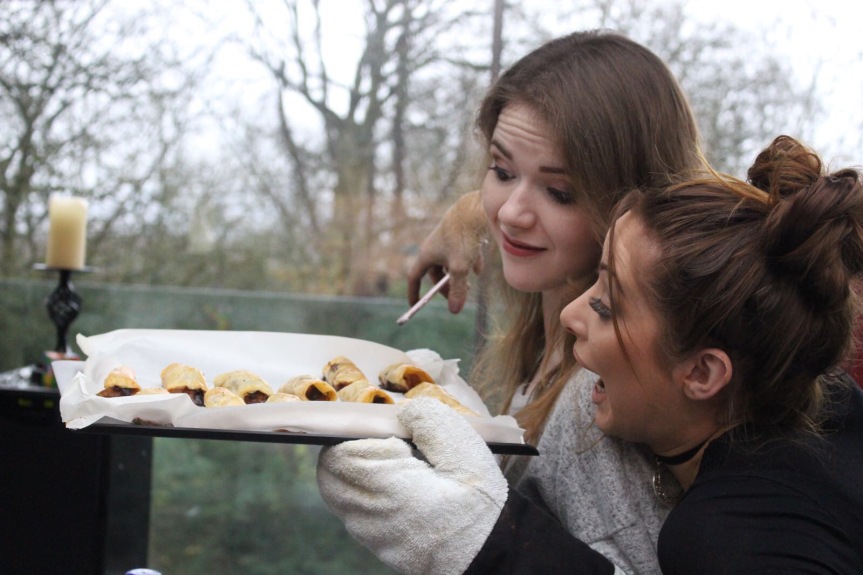
I mean, they are beautiful right?

I’ve seen various slimming world videos circulating around facebook where they use wraps as the pastry too – worth a go if you are feeling inventive! 

Screen Shot 2018-08-04 at 21.44.07.png

Lots and lots and lots of love,

Henrietta x

Wagamama regular.. 

Anyone who know me, or even follows my Instagram, will know the endless love I have for wagamama. 


I mean, come on, just look at it. 

Besides tasting great, my Wagamama favourite dish is actually surprisingly healthy too. 

None of that Katsu curry rubbish, just chilli beef ramen for the soul. 

Well, I have the Wagamama cookbook and I do often make my own ramen, and a few of you have commented asking for the recipe. It is easy to find online but I’ll post it here too. 


I’m a true Wagamama fan, and a few years ago they used to sell their ramen bowls and spoons online. I don’t know why they don’t anymore, but I gathered a collection luckily! If you don’t have the ramen spoon then it might be slightly difficult to slurp the amazing broth, but you can always use a straw! 


Now the chilli sauce that you add to the broth is open to interpretation. I’ve followed the recipe for the chilli sauce before and it wasn’t the same, but I asked someone who worked for Wagamama (dream – free food on your lunch break!!!) and they suggested using sriracha because that’s what Wagamama used to print on their recipe table place-Matt. 

So that’s what I do, and it is so close to the real thing that it’s insane. My only suggestion is that you make your own stock if you can – because using a stock cube or stock from the supermarket makes it taste less authentic. The stock is the only difference I notice when I make my own ramen vs when I eat at Wagamama. It’s such a shame I’m so close to perfection with this dish. 

Anyway, I’m sure the suspense is killing you, so here is the recipe. 


Now if you would like to try and make this chilli ramen sauce then I will post the recipe for that too, but I really do recommend sriracha. 

And if you’re not into steak, you can make the same ramen with a chicken breast. 


The secret to wagamama’s stock is that they use a mixture of chicken and pork bones – so definitely try making their stock if you can. If not, it doesn’t matter too much – but you can taste a slight difference when using supermarket stock. 


Happy cooking! 

Henrietta x

2 months and counting.. 

Today, on the 19th October, marks 2 months away from my surgery date. I have waited patiently. I have had this booked since February and it’s finally starting to feel real. 

So how am I going to celebrate? 

With a recipe post, of course! It’s been a while, so I’m making it a double to satisfy those of you who keep asking for recipes on my Instagram posts. 

Fakeaway chicken (or turkey) korma


Now I am not accompanying this recipe with my baked onion bhaji recipe, as I am yet to perfect the quantities and I would hate to disappoint with what is potentially such a crowd pleaser. 

Ingredients (serves 2)

2 chicken breasts – I sometimes substitute with turkey because it’s slightly leaner (but one turkey breast is plenty for two people!)

100ml chicken stock 

1 chopped onion, diced 

2 tsp korma curry paste (even better if you make your own!) 

200g 0% fat Greek yoghurt (or coconut alpro yoghurt)

1 tsp curry powder (optional)  

Designated coconut (optional) 

Thickening granules (optional)

Method 

1) dice the onion and fry in a little olive oil – I use a spray mechanism to prevent too much oil hitting the pan! 

2) add the chicken/ turkey (cut into chunks) and fry until browning. Once browned, add the chicken stock and bring to the boil. 

3) separately, mix the yoghurt with the korma curry paste until you get a beautiful golden colour – you can adjust the amounts if you prefer! 

4) add the yoghurt mixture to the chicken and stock and mix thoroughly. Let the curry simmer for 10 minutes, adding the curry powder and designated coconut if you would like. 

5) if you prefer your curry sauce thicker, add some thickening granules. You can buy these from most supermarkets. Alternatively, add a little cornflour solution. 


Serve with some cauliflower rice, or basmati rice, and mango chutney! I make my own mango chutney and nothing beats it. 

That brings me on to my next recipe. 

Homemade mango chutney 


Makes 500 ml in total – I fill 4x 125ml jars. 

Ingredients 

  • 4 large mangoes, peeled, stoned and sliced
  • salt
  • 4 cloves garlic, peeled and crushed
  • 200ml agave syrup
  • 2 baking apples, peeled, cored and chopped
  • 1 tbsp English mustard powder
  • 1 tbsp grated fresh root ginger
  • 600ml/1 pint white wine vinegar
  • 1 tbsp cayenne pepper
  • 2-3 teaspoons cumin seeds 

Method

1) slice the mango and sprinkle with salt, put to one side.

2) Put the garlic, agave syrup, apples, mustard, ginger, vinegar and cayenne pepper in a pan and, over a low heat, combine. 

3) wash the mangos. 

4) Bring to the boil and add the mangoes. Simmer for 30 minutes until the chutney is thick and syrupy. Add the cumin seeds depending on your taste. Spoon into sterilised jars and seal.

These will last for months if your jars are sterilised! And they go down a treat! 

So to finish my catch-up post (and I know it’s been a while – the final year of university is taking its toll!) here is a progress photo to celebrate 2 months until my skin is removed

Happy eating!

Henrietta x 

Guilt-free pasta bake 

A pasta bake is a dish that uses minimum effort but gives a big reward.   

I mean, come on, look at that?! 

Often pasta bakes are largely smothered in cheese and not as healthy as we’d all like them to be. 

Well not today. 

No one will stop me from eating whatever I want, I will find a way of enjoying every fat-filled dish in a low fat form.    
So a good pasta bake sauce is obviously required for a pasta bake – if you feel confident making your own then go for it! But I have only recently become aqainted to the pasta bake, so I have used pre-made sauces. Low fat only though! These jars serve four, but I use them to serve six. As far as I’ve noticed, it doesn’t make the bake dry so it makes more sense than buying two jars and being tempted to use all of the contents. 

  
Smokey bacon and chicken pasta bake 

Serves 6.

Ingredients 

500g dried pasta of your choice – cooked

Pasta bake sauce (home pride or dolmio is good – I’ve used dolmio tomato and cheese) 

12 smokey bacon streaky rashers (the ones I used had 2.5g saturated fat per 2 rashers)

225g chicken breast fillet (it’s not a lot but there’s plenty of bacon to add meat)

100g bread crumbs 

Parmesan to finish 


Method 

1. Preheat the oven to 180 degrees Celsius. 

2. Ensure that the 500g of dried pasta is cooked. 

3. Chop chicken and bacon into small pieces, just under an inch long.

4. Fry the chicken in a pan with a little oil for 5-10 minutes, until browned. Add the bacon to the pan and fry until the bacon looks cooked (about 5 further minutes) with the chicken. 

5. Add the pasta and pasta bake sauce to the meat and stir until there is an even distribution of meat throughout the pasta. 

6. Pour contents into an oven proof dish. Flatten for an even surface and evenly spread the breadcrumbs on the surface. 

7. Cook in the oven for 25-35 minutes – until bread crumbs have gone golden.

8. Serve with a sprinkling of Parmesan cheese and enjoy! 


With 2.5g saturated fat from the bacon, less than a gram from the sauce, 0.7g (roughly) from the chicken, and a very small amount from the pasta and breadcrumbs – you’re looking at a total of around 5g saturated fat per serving in this dish. Much less than your typical pasta bake.

Happy cooking!

Henrietta x 

Baked chicken nuggets for those Macdonalds moments.. 

Now I have to admit, I used to eat a hella amount of macdonalds. 

Macdonalds chicken select was my favourite. Mmmmmm yes. 

So how do I combat a macdonalds craving? 

Baked chicken nuggets. Good ones. 


All I have to say is: you’re welcome. 


Ingredients: serves four.

16 oz (2 large) skinless boneless chicken breasts, cut into even bit sized pieces
salt and pepper to taste

2 tsp olive oil

6 tbsp whole wheat Italian seasoned breadcrumbs

2 tbsp panko

2 tbsp grated parmesan cheese

olive oil spray 
Method:

1. Preheat oven to 425°. Spray a baking sheet with olive oil spray.

2. Put the olive oil in one bowl and the breadcrumbs, panko and parmesan cheese in another.

3. Season chicken with salt and pepper, then put in the bowl with the olive oil and mix well so the olive oil evenly coats all of the chicken.

4. Put a few chunks of chicken at a time into the breadcrumb mixture to coat, then on the baking sheet. Lightly spray the top with olive oil spray then bake 8 – 10 minutes. Turn over then cook another 4 – 5 minutes or until cooked though.

Recipe found from skinnytaste.com. 

Henrietta x

Who ate all the LOW FAT pies? 

Oh, those were the days when I would be walking down the road and the group of teenaged boys behind me would chant ‘who ate all the pies?’ when I slipped on the ice infront of me. 

Winter wasn’t my friend.

But why does pie have to be associated with fat people? 

Yeah, I know, buttery pastries and all that can be fattening. Apple pies can be fattening. But why are all pie associated with fat?

I like pie and it is my right to eat it when I want. So the challenge was finding a low-fat pie recipe so that I don’t have to be called a fatty for eating pie. 


Enter this beautiful recipe I found from BBC Good Food, a low-fat chicken pie which I substituted with turkey breast which is supposedly leaner.


Ingredients (serves four)

For the filling

450ml chicken stock, from a cube (I use Kallo, organic)

100ml white wine

2 garlic cloves, finely chopped

3 thyme sprigs

1 tarragon sprig, plus 1 tbsp chopped tarragon leaves

225g carrots, cut into batons

4 skinless chicken breasts, 500g/1lb 2oz total weight

225g leeks, sliced

2 tbsp cornflour, mixed with 2 tbsp water

3 tbsp crème fraîche

1 heaped tsp Dijon mustard

1 healed tbsp chopped parsley

For the topping

70g filo pastry (three 39 x 30 cm sheets ideal)

1 tbsp rapedeed oil 

Method

1. Pour the stock and wine into a large, wide frying pan. Add the garlic, thyme, tarragon sprig and carrots, bring to the boil then lower the heat and simmer for 3 mins. Lay the chicken in the stock, grind over some pepper, cover and simmer for 5 mins. Scatter the leek slices over the chicken, cover again then gently simmer for 10 more mins, so the leeks can steam while the chicken cooks. Remove from the heat and let the chicken sit in the stock for about 15 mins, so it keeps moist while cooling slightly.

2. Strain the stock into a jug – you should have 500ml (if not, make up with water). Tip the chicken and veg into a 1.5 litre pie dish and discard the herb sprigs. Pour the stock back into the sauté pan, then slowly pour in the cornflour mix. Return the pan to the heat and bring to the boil, stirring constantly, until thickened. Remove from the heat and stir in the crème fraîche, mustard, chopped tarragon and parsley. Season with pepper. Heat oven to 200C/180C fan/gas 6.

3. Tear or cut the chicken into chunky shreds. Pour the sauce over the chicken mixture, then stir everything together.

4. Cut each sheet of filo into 4 squares or rectangles. Layer them on top of the filling, brushing each sheet with some of the oil as you go. Lightly scrunch up the filo so it doesn’t lie completely flat and tuck the edges into the sides of the dish, or lay them on the edges if the dish has a rim. Grind over a little pepper, place the dish on a baking sheet, then bake for 20-25 mins until the pastry is golden and the sauce is bubbling. Serve immediately.

  
I actually shoved in whatever vegetables I had in my fridge which worked quite nicely! 

Happy cooking!

Henrietta x 

Chicken salad for simples

I’ve been the fat kid for most of my life (certainly since I can remember) and I’ve gone through the full range of emotions that come with it. People are mean. 

You want to oink at me when I walk past? Cool story.

Go on then, give me a good wolf whistle and snigger when I turn around – that’s original. 

My favourite must have been when I was eleven years old and some eighteen year old told me my bum is so huge it’s blocks out the sun and causes a solar eclipse. Safe to say I’m thrilled that my bum is shrinking.

My point being I’ve been putting up with this rubbish for a long time and I did eventually learn to take it in my stride. I even went along with the nickname shrek. 

I mean, come on, I guess I did earn it.  

I’m ten years old in the above photo (and on a safari holiday so excuse my outfit) but I have always loved food. 

But why do you have to hate the relationship you have with food? I can’t count the number of times I would have a huge portion of food infront of the TV after getting in from the rain (typical English weather). It was always comforting. 

It’s less comforting when you check your weight on the scales afterwards. 

Can I really blame food for all of this though? I’m sure I could have learnt to move a bit more.  

I never really understood the problems that come with eating too much until something finally happened to me to prove I was damaging myself. 

“Yeah, sure, I might get heart disease and die ridiculously early.. But I won’t, right? I’ll just lose weight later.

Oh my god, how many times I told myself that I would lose weight later probably made it my catchphrase. But then I got diagnosed with type two diabetes and people told me I was just like grandma. 

Hang on a second.

Grandma is great and all but I don’t want to join the ‘diabetes club’ with her. Sorry grandma, I’ll leave diabetes with you.

And so it began: healthy eating, exercising and actually caring about what I put in my body. 

For anyone out there who has no idea where to start try what I did. Start by following balanced recipes from my trusted recipe book. Once I got the hang of it I could then balance my own meals. And just grit your teeth and do the exercise. 

Back to my main point though – check out my beautiful lunch. 

I’ve been doing this a lot lately – a mixed salad. It surprises me that I’ve become one of those people who eat plants. What has become of me? 😂

It’s a fairly easy recipe to make. You just basically wing it. 

Ingredients (serves one)

1 chicken breast

Handful of mixed salad leaves

100g parboiled potatoes (you can chop these into wedges and oven bake them for a crunch!) 

Cherry tomatoes (you can chop a normal tomato too!)

1 teaspoon pesto

Salt and pepper to season

Garlic salt

Mixed herbs (for if you oven baked the potatoes)

Vegetables of your choice

Method

1. Preheat the oven to 180 degrees Celsius.

2. Chop the parboiled potatoes into wedges, sprinkle with mixed herbs and season. Bake for 15 minutes.

3. Add the chicken breast to oven and bake for a further 20 minutes with the wedges. Why not add some lemon juice? That just popped into my mind.

4. Whilst the oven ingredients bake, put a handful of mixed salad on a plate and add the tomatoes and vegetables of your choice. Sprinkle over a little garlic salt (if you can find it).

5. Distribute the teaspoon of pesto on the salad – try to spread it evenly. 

6. Add the wedges and chopped chicken to the salad, add a dressing if you would like.

And I’m certainly no expert but its pretty low calories and low fat provided you have a normal-sized chicken breast. Around 100g is great but most chicken breasts weigh a little more. I aim for around 125g or I trim it.

Enjoy my simple cooking. It really is that easy.

Henrietta x

A top tip for those lazy days 

We all have those days. Those day when we just don’t have the strength or the energy to cook. Sometimes I get back from working, having just spent an hour and a half travelling and I think ‘well I just can’t cook right now’ (not to mention I will have forgotten to defrost some meat from the freezer). 

There’s a point – I always portion my meat and freeze it in portions to prevent cooking or eating too much. A year ago I used to cook a six-pack of Chinese chicken thighs (at 260 calories per thigh and a high fat content) and eat them all with the biggest bowl of rice ever (a salad bowl full). 

Anyhow, I may get home sometimes and be completely exhausted or just too plain lazy to cook a meal. 

How do I deal with this? I’m always stocked up on ready meals. I’m not talking any old ready meals, I’m talking healthy, Marks and Spencer’s ‘count on us’ range. I highly recommend these meals, at around 400 calories per meal they all tend to be in the green for fat, saturated fat and sugars. 

  Could you ever believe you could still eat curry?   I never imagined Indian takeaway would still be on the menu. More of a Thai food fan? Not a problem! 

 A HUGE portion of spicy chicken tagliatelle? You don’t have to say no to everything. (I know this looks large, but it is only 384 calories!) Even a cheeky Chinese can be allowed.

My point being its okay to be lazy. We all have commitments, in reality no one expects that we all have the time in the morning to food prep. 

Obviously I wouldn’t recommend becoming reliant on these meals, I find it’s much more fun cooking fresh, new dishes! But, if you are tempted to order a takeaway after a long day – HANG UP THE PHONE. It’s not happening.

Of course if you don’t have a local marks and Spencer’s, many supermarkets offer the healthier versions of their microwave meals. Co-op, tesco and sainsburys have a range of healthier options, just stick to the nutritional information being in the green for fat, saturated fat and sugars. 

Good luck avoiding the microwave from now on! 

Henrietta x

You can’t resist a Sunday dinner

Well I’m British, and we like to celebrate our Sunday’s in style: with a large, high calorie roast dinner. 

I get that dieters are allowed to indulge every so often, but a massive roast every Sunday would mean I could never have a different sneaky treat (I’m talking about you, chocolate.)

In an ideal world we could all eat massive amounts of roast pork with crackling, roast potatoes, yorkshire puddings, stuffing and pile the gravy on top but, come on, that’s just not realistic for a struggling fatty like me. 

I tend to avoid Sunday roasts, but when I visit home and my family have planned a huge roast dinner how could I say no? So my dad, being the ‘gentleman’ he is, agreed to let me choose which meat to roast so to help support my diabetic diet. 

You can’t go wrong with chicken, right? It certainly is less fatty than other roast meats, like pork or lamb.

Anyhow, why not have a Sunday roast every Sunday if you follow these simple rules..?

Roast herby chicken with roasted veg

FullSizeRender

So here are my rules on handling a Sunday roast:

  1. Fill your plate with plenty of vegetables, fill your belly with plenty of vegetables – whatever, just eat the vegetables.
  2. As I did, choose the least fatty meat you can where possible. Even when visiting a carvery you are sometimes given the choice of meat.
  3. Roast potatoes? Try roasting sweet potatoes instead, add a little rosemary and some garlic granules (or garlic salt) and make sure you really roast those low GI little suckers. AND, if you substitute your potatoes for sweet potatoes you can probably get away with a cheeky yorkshire pud!
  4. ROASTED CARROTS. Normally I absolutely despise cooked carrots, but this time I decided to squeeze a little agarve syrup over them with a sprig of rosemary and MY GOD THEY WERE GOOD. I COULD HAVE JUST EATEN THEM.
  5. Don’t ever add goose fat. Why do people even do that?
  6. Make sure you have no more than a quarter of the chicken: that way, you’re only looking at about 150-200 calories in the meat. Avoid the skin, too!
  7. Don’t overdo it on the gravy – treat it more like a delicate jus with your fancy gourmet posh roast dinner. 

All in all, I must have had about 500 calories in my Sunday roast dinner – which is a dieter’s dream. 

If anyone here is at all interested in how this meal was made I must disappoint you – my dad bought a ‘roast in the bag’ ready herbed-up chicken that you just bung in the oven. Even still, yum!

Happy roasting!

Henrietta x

Occasional indulgence never hurt anyone

I love risotto.

But, really, risotto? For diabetics? I never thought I would find any recipe for starchy risotto designed to keep blood glucose levels at bay.

Well I found one! And, although my blood sugars 2 hours after my meal were slightly higher than usual (but still in range), why not every so often have some indulgent risotto? So here you have it, found on the diabetes UK website here.

Chicken risotto with spring vegetables (serves 3)

FullSizeRender

Ingredients

1 teaspoon olive oil

1 small onion, finely chopped

1 clove garlic, crushed

2 boneless, skinless chicken breasts, chopped

225g risotto rice

1 litre hot chicken stock

100g asparagus spears, halved 

150g frozen peas

2 tablespoons parmesan cheese

2 tablespoons freshly chopped parsley

salt and freshly ground black pepper

Method

  1. Heat the oil in a large non-stick frying pan, add the onion and garlic and fry for 1 minute. Add the chicken and continue to fry for 2-3 minutes.
  2. Stir in the rice and coat with the oil. Gradually add the hot stock, stirring continuously, allowing each addition to be absorbed before adding the next.
  3. Stir in the asparagus and peas with the last addition of stock and continue to cook. The whole cooking process should take about 20 minutes and the rice should be ‘al dente’.
  4. Stir through the Parmesan cheese and parsley, season well and serve.

Per serving

472 calories; 72g carbohydrate; 28.8g protein; 7.9g fat; 2.4g saturated fat; 3.1g sugars; 1.8g salt

If you’re a vegetarian you can use vegetable stock rather than chicken stock and add mushrooms rather than chicken. It really is a lovely recipe, and I’m so happy I found a risotto recipe that didn’t involve adding heavy cream – and this recipe is certainly not lacking in tasting creamy and indulgent!

The carbohydrates in this dish are slightly higher than desired, hence my blood sugars being slightly raised after the meal, so if you are diabetic than try not to have this recipe regularly. If you’re not diabetic then go ahead and have it everyday! 

Happy cooking!

Henrietta x